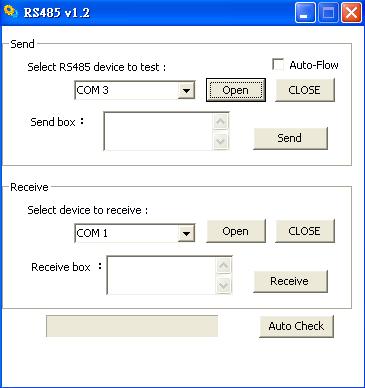
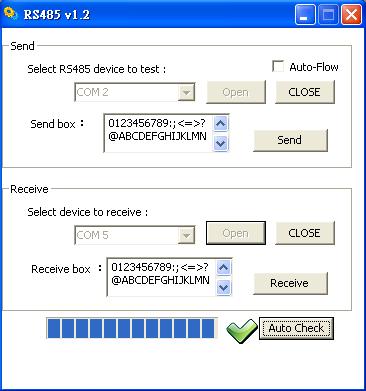
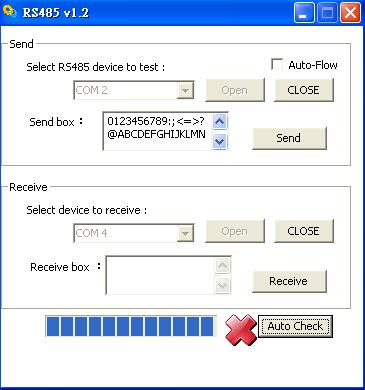
請先看『使用說明』
RS485 Module
From LEXWiKi
(→The Sample code source you can download from) |
|||
| (21 intermediate revisions not shown.) | |||
| Line 1: | Line 1: | ||
[[Category:AllowPages]] | [[Category:AllowPages]] | ||
== The Sample code source you can download from == | == The Sample code source you can download from == | ||
| + | <!-- | ||
| + | <Google Drive> | ||
| - | Source file: [ | + | Source file: [https://drive.google.com/file/d/1ixqpx2b5iPYhAdI4xTC_dLujtm1oYz-Q/view?usp=sharing RS485_Src] |
| - | Binary file: [ | + | Binary file: [https://drive.google.com/file/d/1XVpJU6XSUj2D5lSnNfB-YHN9Wl64o9qW/view?usp=sharing RS485_Bin] |
| + | --> | ||
| + | |||
| + | <FTP> | ||
| + | |||
| + | Source file: [ftp://ftp.lex.com.tw/Engineer/SoftSupport/AP_Module/RS485/RS485_Src_v1.2.rar RS485_Src] | ||
| + | |||
| + | Binary file: [ftp://ftp.lex.com.tw/Engineer/SoftSupport/AP_Module/RS485/RS485_Bin_v1.2.rar RS485_Bin] | ||
== How to use this Demo Application == | == How to use this Demo Application == | ||
| - | [[Image: | + | [[Image:485init.jpg]] |
1. Select RS485 com port to test and then click "Open" button (click close before you change another com) | 1. Select RS485 com port to test and then click "Open" button (click close before you change another com) | ||
| Line 13: | Line 22: | ||
2. Select receive com port and press Open | 2. Select receive com port and press Open | ||
| - | 3. Put some letter in editbox and then press " | + | 3. Put some letter in editbox and then press "Send", the editbox of receive will appear what you just enter. |
| + | |||
| + | 4. Check "Auto-Flow" if you want to test auto flow function | ||
Auto Check | Auto Check | ||
| Line 19: | Line 30: | ||
Click "Auto Check" will check RS485 automaticlly and show the result after finish . | Click "Auto Check" will check RS485 automaticlly and show the result after finish . | ||
| - | [[Image: | + | [[Image:485OK.jpg]] [[Image:485NO.jpg]] |
| + | |||
| + | == Test == | ||
| + | Please following below when use this application to test COM functions. | ||
| + | <center>[[Image:Conection_path.jpg]]</center> | ||
| + | ===picture of example=== | ||
| + | '''Parallel line'''<br /> | ||
| + | To be used in : 485->M303(485) 、 M303(485)->485 、 M303(485)->M303(485)<br /> | ||
| + | <center>[[Image:parallel.jpg]]</center> | ||
| + | <br /><br /> | ||
| + | '''Parallel line + crossover + converter'''<br /> | ||
| + | To be used in : 485->232 、 M303(485)->232 、 232->485 、 232->M303<br /> | ||
| + | <center>[[Image:485to232.jpg]]</center> | ||
| + | <br /><br /> | ||
| + | '''Corssover'''<br /> | ||
| + | Cross Tx node and Rx node<br /> | ||
| + | <center>[[Image:crossover.jpg]]</center> | ||
| + | <br /><br /> | ||
| + | '''Converter'''<br /> | ||
| + | RS232 and RS485 signal converter<br /> | ||
| + | <center>[[Image:converter.jpg]]</center> | ||
| + | |||
| + | == Sample code Introduction == | ||
| + | '''Set Com port''' | ||
| + | m_CommSend.put_CommPort(PortIndex); // int PortIndex: Port Number | ||
| + | m_CommSend.put_Settings("9600,n,8,1");//baud rate ,parity ,data bit ,stop bit | ||
| + | <br /> | ||
| + | <br /> | ||
| + | '''When Receive buffer get more than one byte and will cause a ONCOMM message.''' | ||
| + | m_CommSend.put_RThreshold(1); | ||
| + | <br /> | ||
| + | <br /> | ||
| + | '''Open Com port''' | ||
| + | m_CommSend.put_PortOpen(TRUE);//Setting false and let port be closed | ||
| + | m_CommSend.get_PortOpen();//Return ture if port is opened. | ||
| + | <br /> | ||
| + | <br /> | ||
| + | '''Let RTS high by Setting TRUE when send data''' | ||
| + | m_CommSend.put_RTSEnable(TRUE); | ||
| + | <br /> | ||
| + | <br /> | ||
| + | '''Send data or Receive data by buffer''' | ||
| + | m_CommSend.put_Output(COleVariant(m_StrSendData));//Send data to Com Port buffer | ||
| + | variant_inp = m_CommReceive.get_Input();//Receive data from Com Port buffer | ||
| + | |||
| + | <br /><br /> | ||
| + | |||
| + | |||
| + | |||
| + | |||
| + | |||
| + | == Enable Auto-Flow == | ||
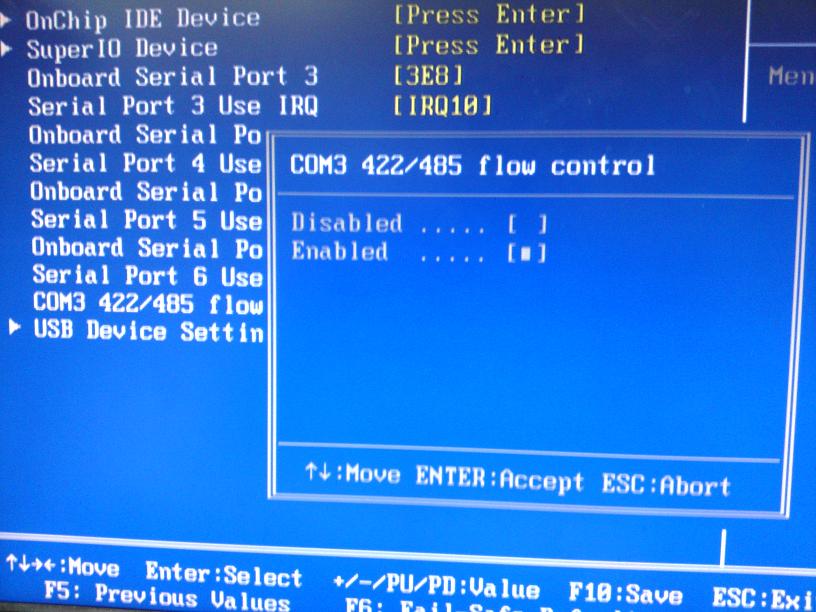
| + | Enable/Disable auto-flow from bios setting ( '''Integrated Peripherals''' -> '''COM3 422/485 flow control''' ) <br> | ||
| + | [[Image:bios.jpg]] | ||
| + | <br> | ||
| + | |||
| + | Supported Auto-Flow M/B<br> | ||
| + | VIA<br> | ||
| + | CV700C, CV766C, 3V700C, 5V700C | ||
| + | |||
| + | INTEL<br> | ||
| + | FI853P, CI945C, CI270C, 3I270A, 3I270C, FI270A | ||
Current revision
Contents |
The Sample code source you can download from
<FTP>
Source file: RS485_Src
Binary file: RS485_Bin
How to use this Demo Application
1. Select RS485 com port to test and then click "Open" button (click close before you change another com)
2. Select receive com port and press Open
3. Put some letter in editbox and then press "Send", the editbox of receive will appear what you just enter.
4. Check "Auto-Flow" if you want to test auto flow function
Auto Check
Click "Auto Check" will check RS485 automaticlly and show the result after finish .
Test
Please following below when use this application to test COM functions.
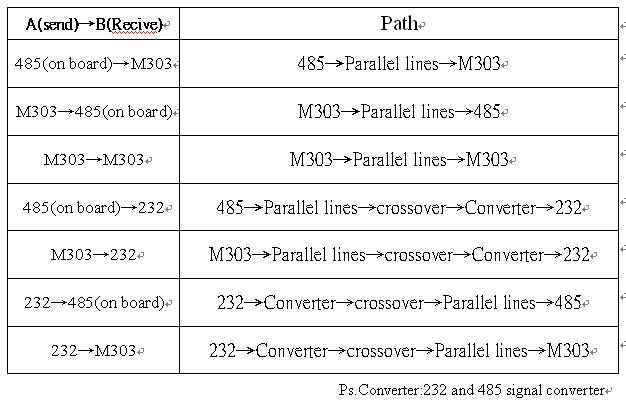
picture of example
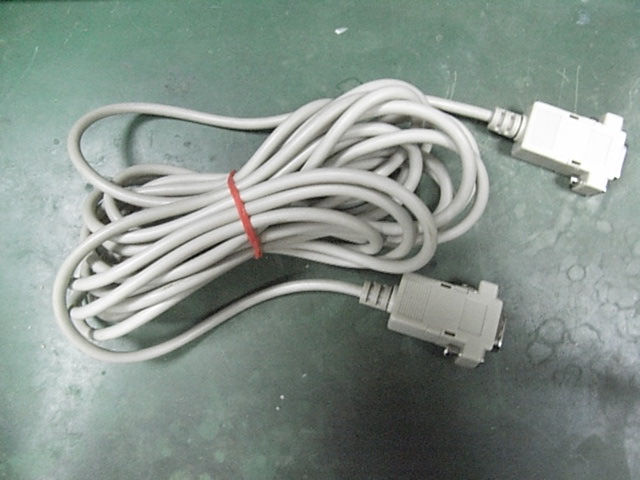
Parallel line
To be used in : 485->M303(485) 、 M303(485)->485 、 M303(485)->M303(485)
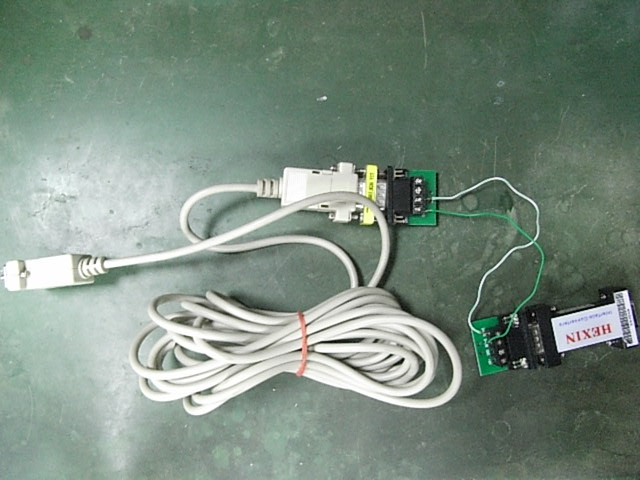
Parallel line + crossover + converter
To be used in : 485->232 、 M303(485)->232 、 232->485 、 232->M303
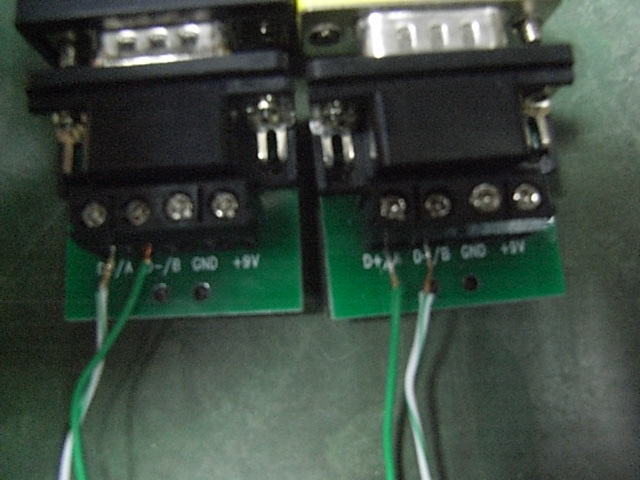
Corssover
Cross Tx node and Rx node
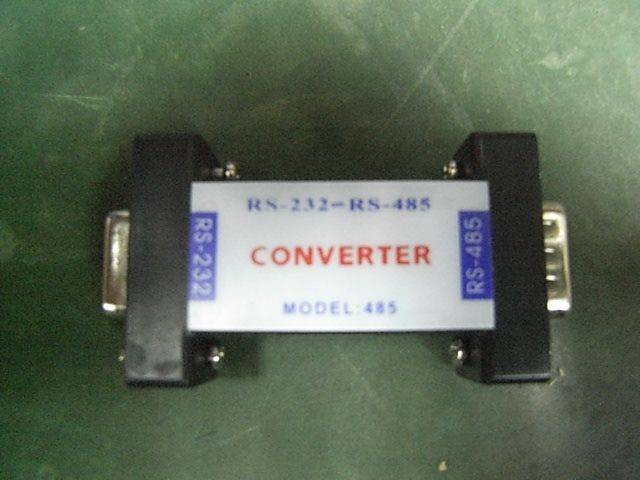
Converter
RS232 and RS485 signal converter
Sample code Introduction
Set Com port
   m_CommSend.put_CommPort(PortIndex); // int PortIndex: Port Number
   m_CommSend.put_Settings("9600,n,8,1");//baud rate ,parity ,data bit ,stop bit
When Receive buffer get more than one byte and will cause a ONCOMM message.
m_CommSend.put_RThreshold(1);
Open Com port
   m_CommSend.put_PortOpen(TRUE);//Setting false and let port be closed
   m_CommSend.get_PortOpen();//Return ture if port is opened.
Let RTS high by Setting TRUE when send data
m_CommSend.put_RTSEnable(TRUE);
Send data or Receive data by buffer
   m_CommSend.put_Output(COleVariant(m_StrSendData));//Send data to Com Port buffer
   variant_inp = m_CommReceive.get_Input();//Receive data from Com Port buffer
Enable Auto-Flow
Enable/Disable auto-flow from bios setting ( Integrated Peripherals -> COM3 422/485 flow control )
Supported Auto-Flow M/B
VIA
CV700C, CV766C, 3V700C, 5V700C
INTEL
FI853P, CI945C, CI270C, 3I270A, 3I270C, FI270A
