請先看『使用說明』
MB Auto Tool
From LEXWiKi
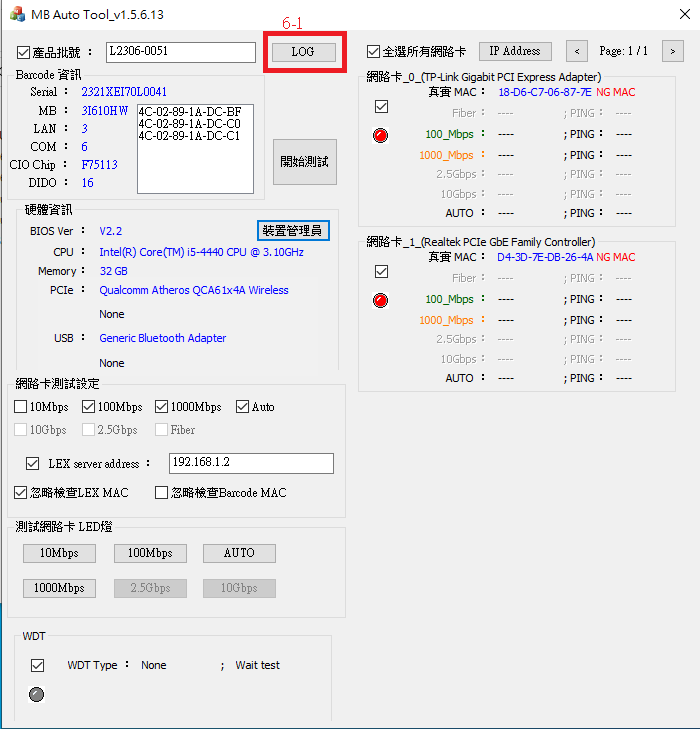
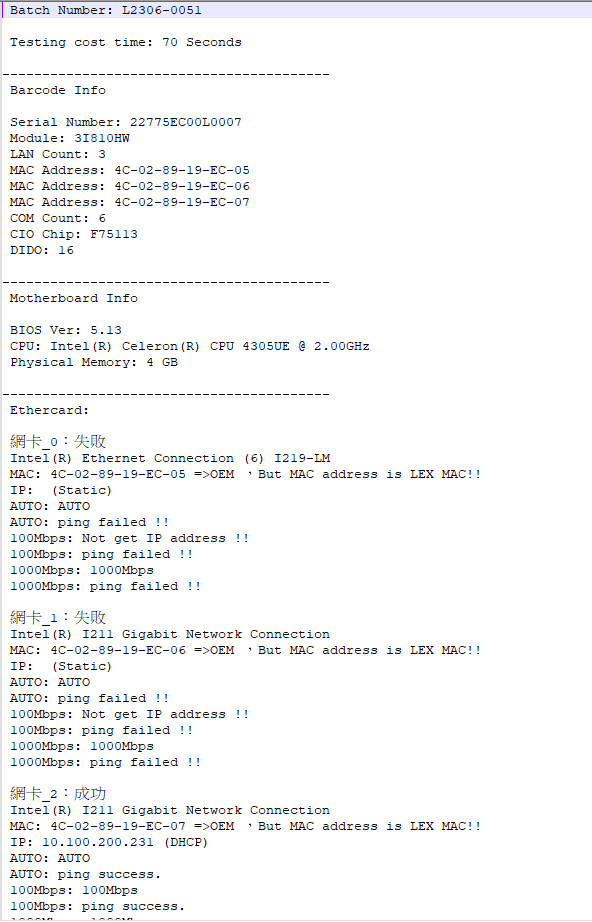
(→Testing report txt) |
|||
| Line 84: | Line 84: | ||
=== Testing report txt === | === Testing report txt === | ||
| - | [[Image: | + | [[Image:MAT_00002-6.png]]<br /> |
| + | [[Image:MAT_00002-7.png]]<br /> | ||
Revision as of 18:02, 12 June 2023
Contents |
Introduction
MB Auto tool is a tool for testing the functions of LEX motherboard.
The binary file you can download from
(*)Windows7 must updated KB2999226
(*)Windows must updated Redistributable latest supported For X64
<Google Drive>
Binary file(64 bit): MB Auto Tool_v1.5.6.13_x64
Simple Manuual Guide(Chinese): Simple Manuual Guide
<FTP>
Binary file(64 bit): MB Auto Tool_v1.5.6.13_x64
Simple Manuual Guide(Chinese): Simple Manuual Guide
How to use MB Auto tool
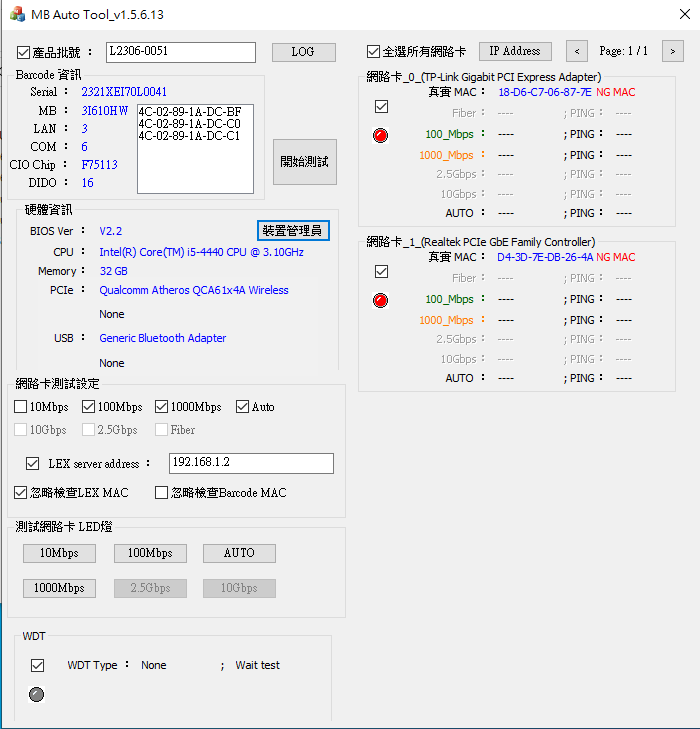
When start utility, it will auto scan and show base hardware information on the motherboard.
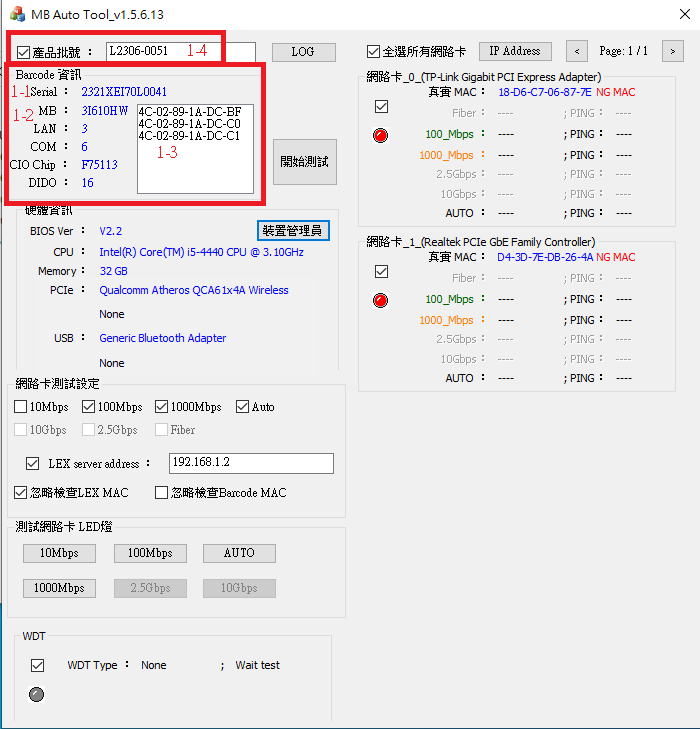
Support scan barcode reading motherboard information
You could get motherboard serial number and MAC address depends on scanning barcode.
And utility will auto searching motherboard model、count of LAN port、count of COM port and CIO information from MB_BarCode.ini.
If batch number check box is checked, batch number must be key in before testing.
Otherwise, batch number checking will be skip.
- 1-1. Serial number information from barcode.
- 1-2. Motherboard model、count of LAN port、count of COM port and CIO information from MB_BarCode.ini..
- 1-3. MAC address information from barcode.
- 1-4. Batch number check box and edit box.
BIOS and base hardware information
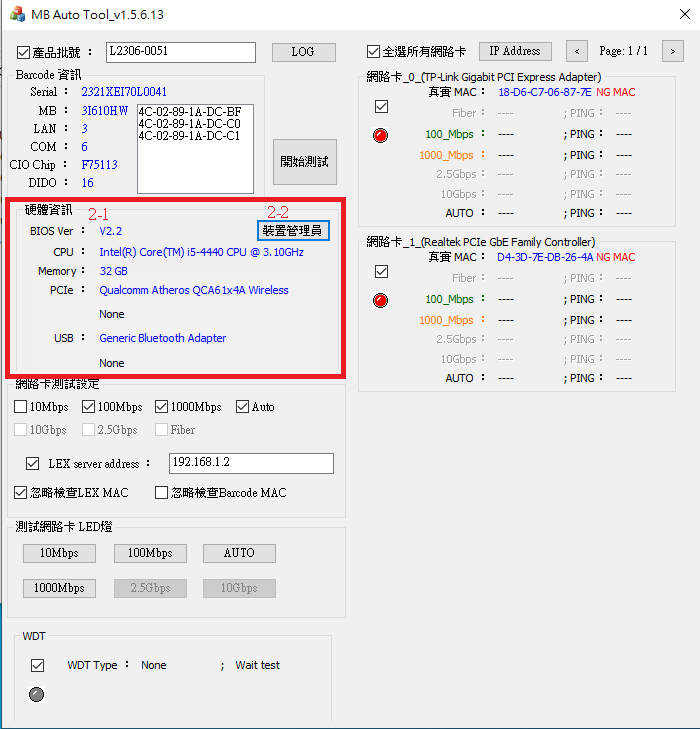
When start utility, it will auto scan BIOS and hardware information on the motherboard.
If mini card is inserted, it will auto scan and show PCIE or USB device.
- 2-1. BIOS and base hardware information.
- 2-2. Press button to call hardware manager from windows.
Modify batch IP address
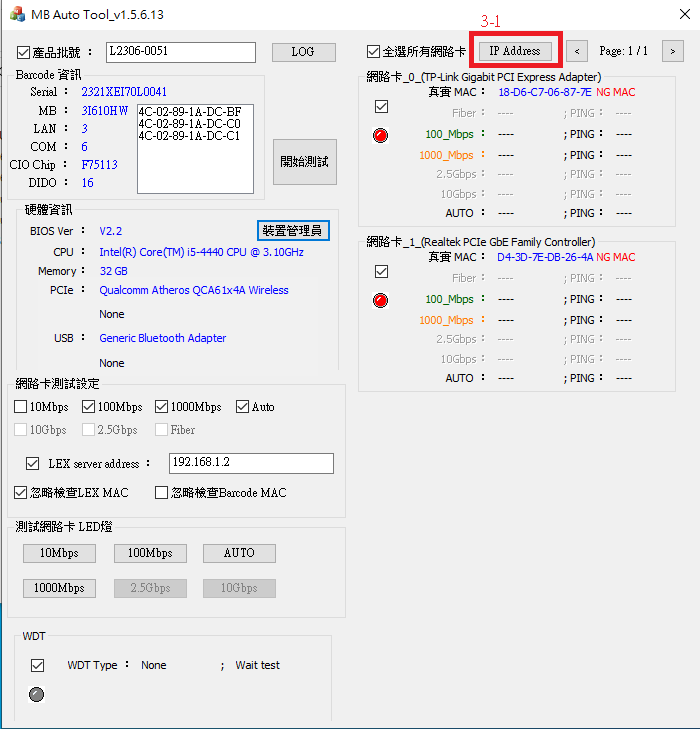
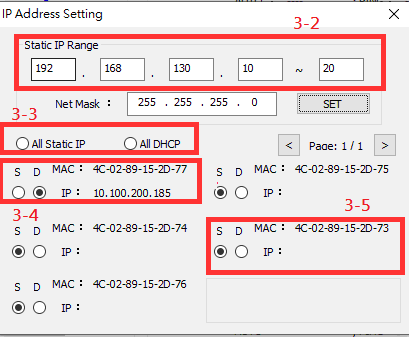
Help you to modify batch IP address automatically.
- 3-1. Press button to pop up IP setting menu.
- 3-2. Type static IP address range.
- 3-3. Set static IP or dynamic IP to all ether card.
- 3-4. Ether card information window. If network cable is inserted, show reality IP address.
- 3-5. Ether card information window. If network cable is not inserted, show blank.
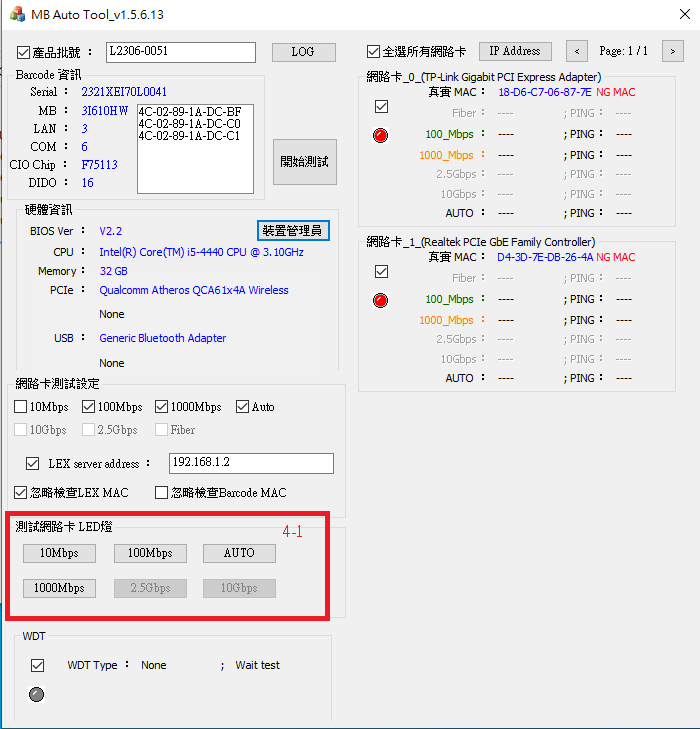
Switch ether card duplex mode
You could modify selected ether card duplex mode manually. Button is disable if net chip not support.
- 4-1. Press button to switch selected ether card duplex mode.
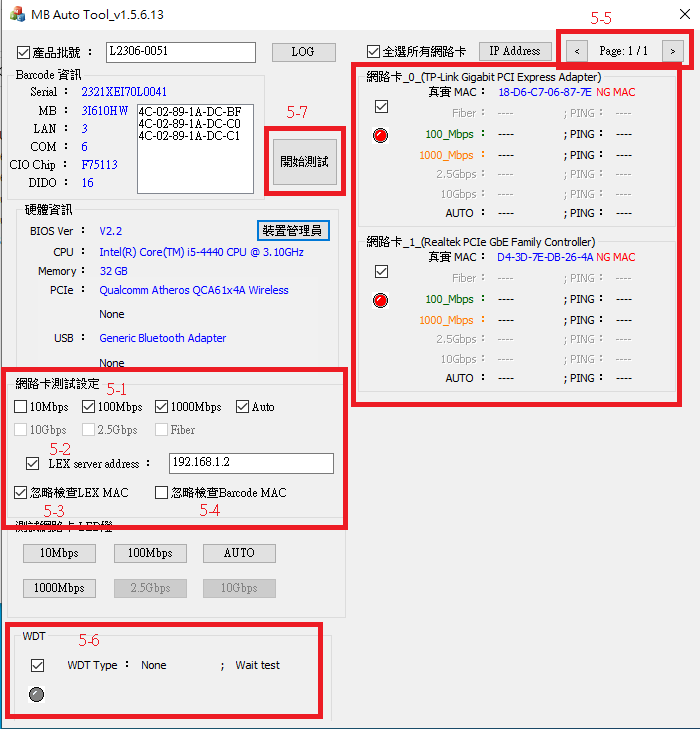
Testing ether card and WDT
You could test selected ether card expected speed value and reality speed value. And it detect WDT type.
- 5-1. Select which duplex mode ready to test.
- 5-2. Enter network connecting test server address. Tick the checkbox is connecting to LEX server(192.168.1.2).
- Untick the checkbox is connecting to google NTP server(time.google.com).
- 5-3. Tick the checkbox. It could skip checking MAC address that is legal from LEX MAC address.
- 5-4. Tick the checkbox. It could skip checking MAC address that is legal from barcode.
- 5-5. Press button to switch next page or preve page about ether card testing result.
- 5-6. Tick the checkbox. It could get WDT type on the motherboard.(Current support: F75111 SMBUS、F75113 SMBUS、F75113 LPC、F81966 LPC)
- 5-7. Press button to start testing selected ether card, WDT, and set system time from NTP.
