請先看『使用說明』
MB Auto Tool
From LEXWiKi
(Difference between revisions)
(→軟體簡介) |
|||
| Line 31: | Line 31: | ||
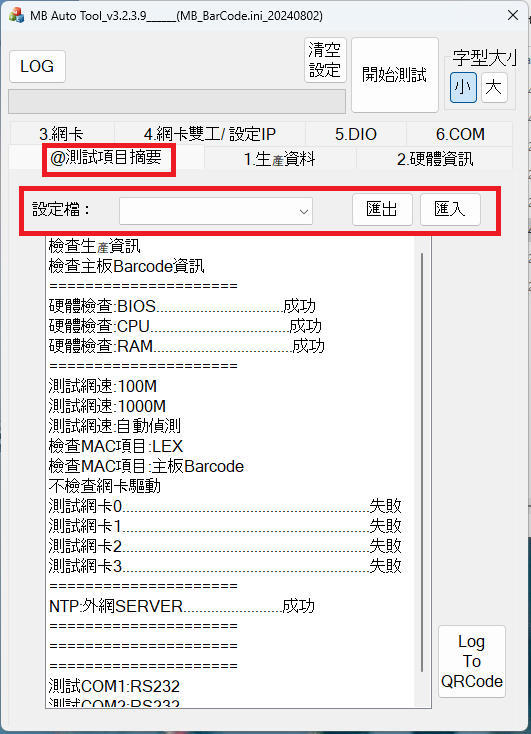
'''軟體執行時,會自動掃描並列表主機板的BIOS及硬體訊息'''<br /> | '''軟體執行時,會自動掃描並列表主機板的BIOS及硬體訊息'''<br /> | ||
[[Image:MAT_AA00002.png]]<br /><br /> | [[Image:MAT_AA00002.png]]<br /><br /> | ||
| + | |||
| + | '''如果有安裝指定的mini card,軟體也會列出指定mini card的硬體訊息'''<br /> | ||
| + | *1-1. BIOS版本號<br /> | ||
| + | *1-2. Intel Management Engine版本號<br /> | ||
| + | *1-3. CPU型號<br /> | ||
| + | *1-4. 記憶體大小<br /> | ||
| + | *1-5. CPU溫度<br /> | ||
| + | *1-6. 系統溫度<br /> | ||
| + | *1-7. HCI主機控制介面<br /> | ||
| + | *1-8. TPM<br /> | ||
| + | *1-9. TXE<br /> | ||
| + | *1-10. NTP校時<br /> | ||
=== 藉由掃描主機板上的QR code條碼,從 MB_BarCode.ini中獲得主機板的MAC位址及網卡、COM、DIO的配置資訊 === | === 藉由掃描主機板上的QR code條碼,從 MB_BarCode.ini中獲得主機板的MAC位址及網卡、COM、DIO的配置資訊 === | ||
[[Image:MAT_AA00003.png]]<br /><br /> | [[Image:MAT_AA00003.png]]<br /><br /> | ||
| - | + | [[Image:MAT_AA00004.png]]<br /><br /> | |
| - | + | ||
| - | + | ||
| - | + | ||
| - | + | ||
| - | + | ||
| - | [[Image: | + | |
| - | + | *2-1. Serial number information from barcode.<br /> | |
| - | + | *2-2. Motherboard model、count of LAN port、count of COM port and CIO information from MB_BarCode.ini..<br /> | |
| - | *2- | + | *2-3. MAC address information from barcode.<br /> |
| - | *2- | + | *2-4. Batch number check box and edit box.<br /> |
=== Modify batch IP address === | === Modify batch IP address === | ||
Revision as of 16:39, 5 August 2024
Contents |
軟體簡介
MB Auto tool 是一套可以幫助你簡單驗證LEX主機板功能的軟體.
The binary file you can download from
(*)Windows7 must updated KB2999226
(*)Windows must updated Redistributable latest supported For X64
<Google Drive>
Binary file(64 bit): MB Auto Tool_v3.2.3.9_x64
MB Auto tool功能介紹
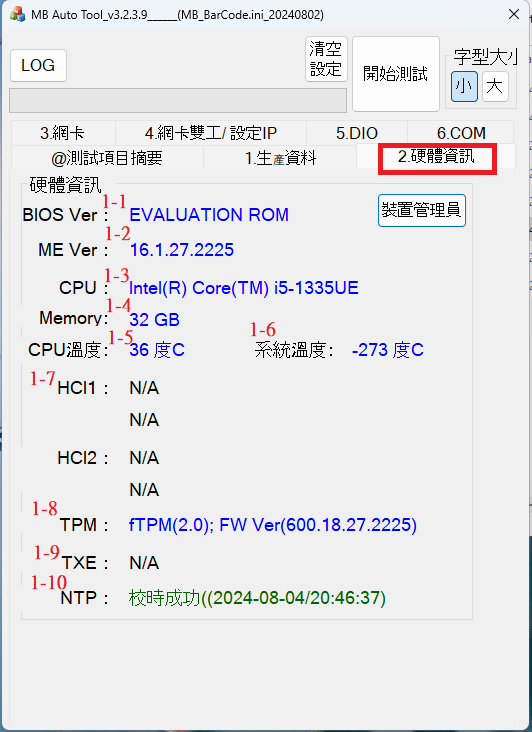
如果有安裝指定的mini card,軟體也會列出指定mini card的硬體訊息
- 1-1. BIOS版本號
- 1-2. Intel Management Engine版本號
- 1-3. CPU型號
- 1-4. 記憶體大小
- 1-5. CPU溫度
- 1-6. 系統溫度
- 1-7. HCI主機控制介面
- 1-8. TPM
- 1-9. TXE
- 1-10. NTP校時
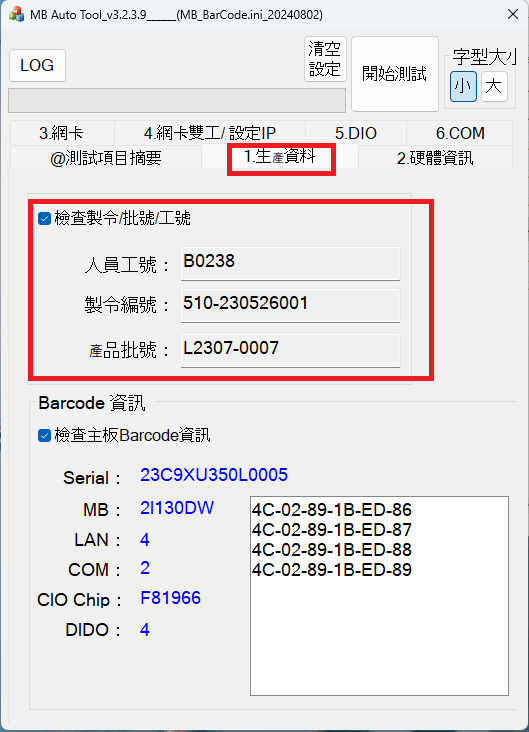
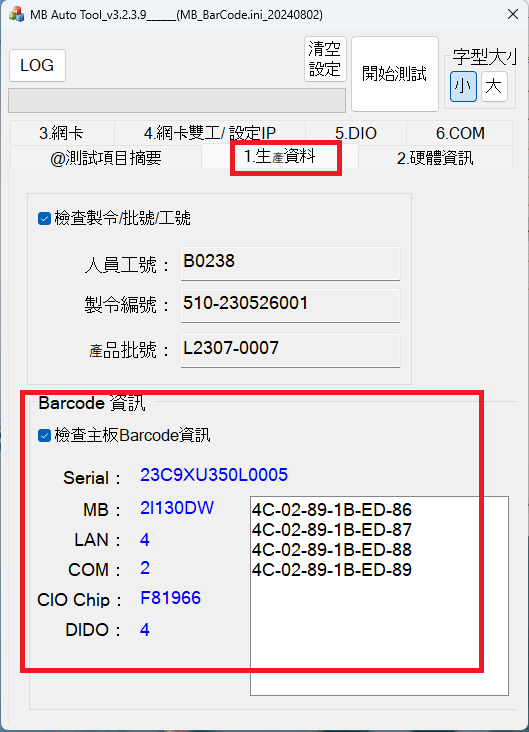
藉由掃描主機板上的QR code條碼,從 MB_BarCode.ini中獲得主機板的MAC位址及網卡、COM、DIO的配置資訊
- 2-1. Serial number information from barcode.
- 2-2. Motherboard model、count of LAN port、count of COM port and CIO information from MB_BarCode.ini..
- 2-3. MAC address information from barcode.
- 2-4. Batch number check box and edit box.
Modify batch IP address
Help you to modify batch IP address automatically.
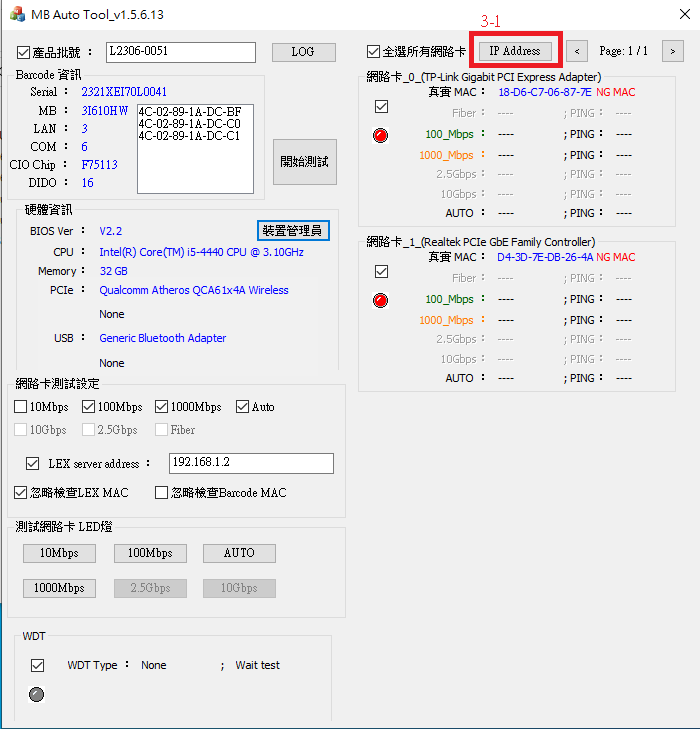
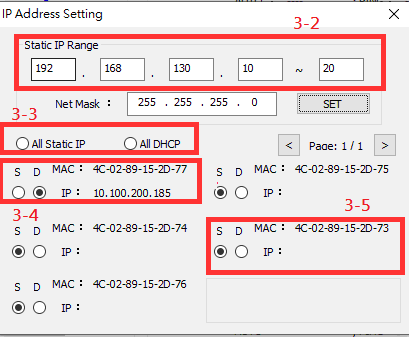
- 3-1. Press button to pop up IP setting menu.
- 3-2. Type static IP address range.
- 3-3. Set static IP or dynamic IP to all ether card.
- 3-4. Ether card information window. If network cable is inserted, show reality IP address.
- 3-5. Ether card information window. If network cable is not inserted, show blank.
Switch ether card duplex mode
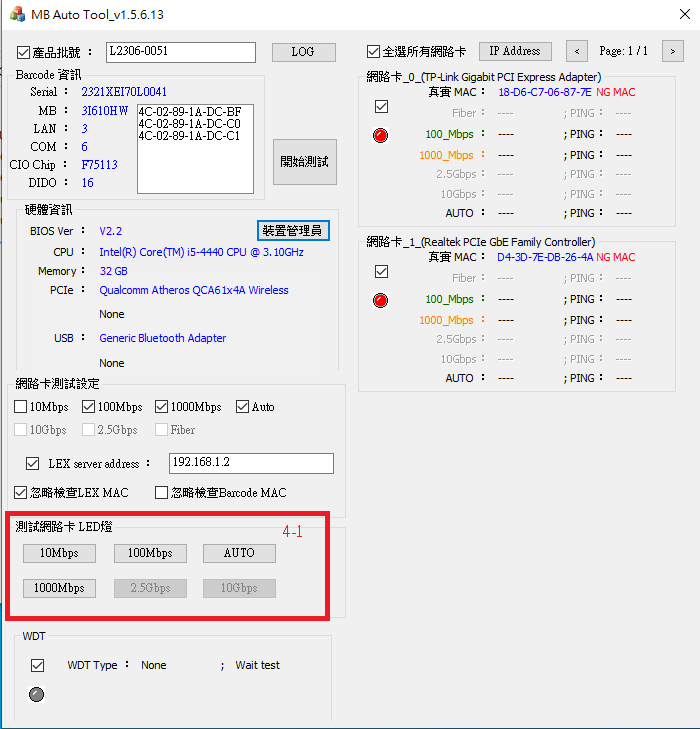
You could modify selected ether card duplex mode manually. Button is disable if net chip not support.
- 4-1. Press button to switch selected ether card duplex mode.
Testing ether card and WDT
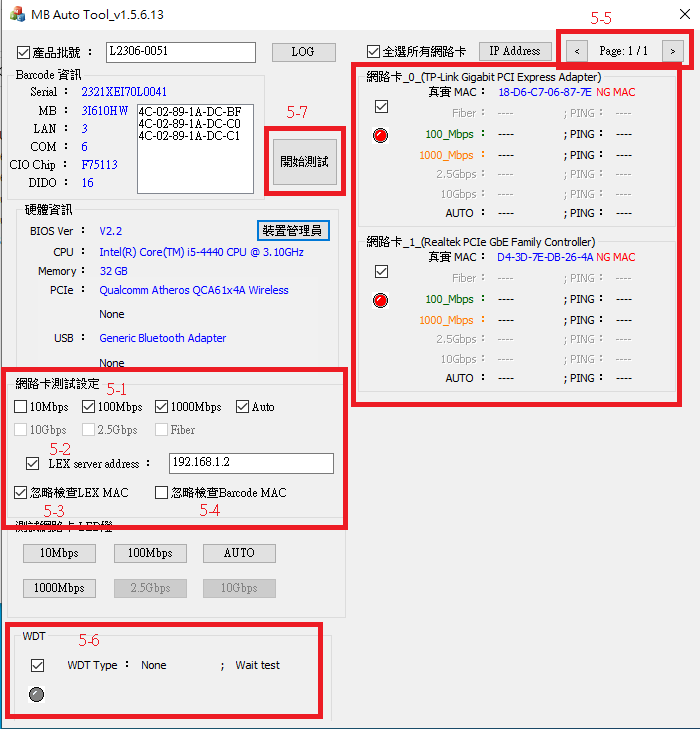
You could test selected ether card expected speed value and reality speed value. And it detect WDT type.
- 5-1. Select which duplex mode ready to test.
- 5-2. Enter network connecting test server address. Tick the checkbox is connecting to LEX server(192.168.1.2).
- Untick the checkbox is connecting to google NTP server(time.google.com).
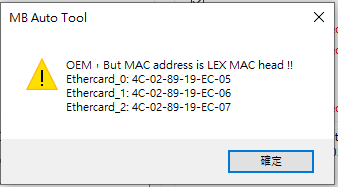
- 5-3. Tick the checkbox. It could skip checking MAC address that is legal from LEX MAC address.
- If tick the checkbox and LEX MAC address to scanned, popup warning message.
- 5-4. Tick the checkbox. It could skip checking MAC address that is legal from barcode.
- 5-5. Press button to switch next page or preve page about ether card testing result.
- 5-6. Tick the checkbox. It could get WDT type on the motherboard.(Current support: F75111 SMBUS、F75113 SMBUS、F75113 LPC、F81966 LPC)
- 5-7. Press button to start testing selected ether card, WDT, and set system time from NTP.
Testing report txt
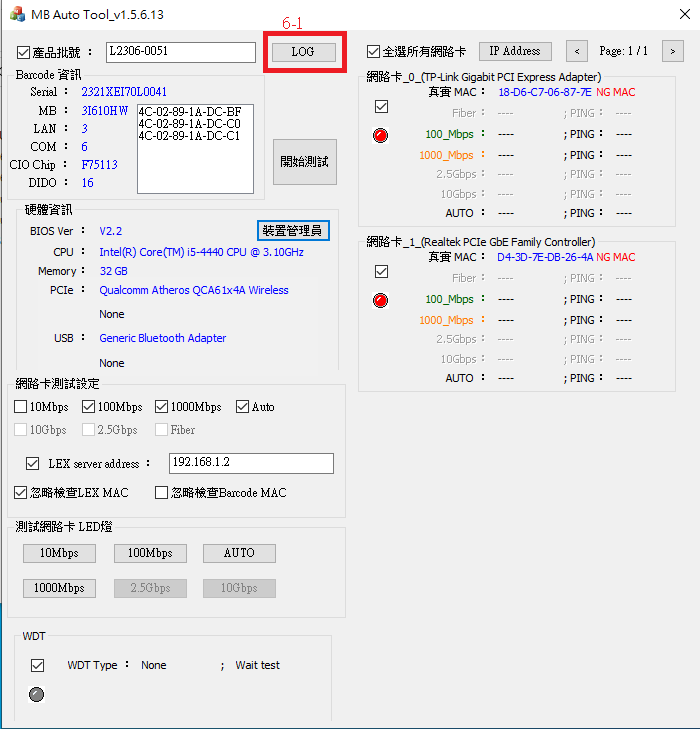
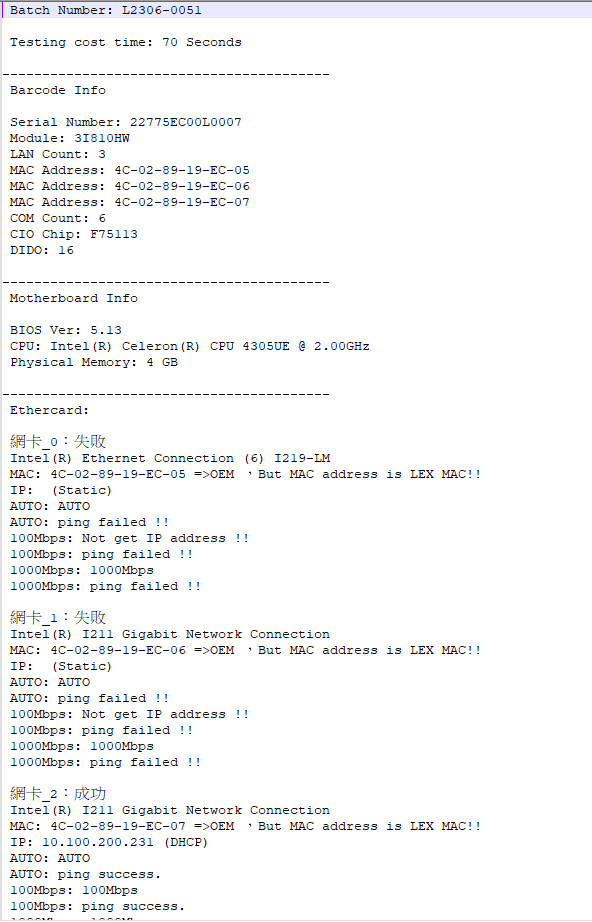
Utility will create one test report in LOG folder after finish one test.
You could read testing detail from report.
Report file name build by barcode serial number. If not scan barcode, file name build by current time.
- 6-1. Press button to open LOG folder.
