請先看『使用說明』
IO Device:IntelDIO
From LEXWiKi
(Difference between revisions)
| Line 59: | Line 59: | ||
1. Connected the DI and DO pin | 1. Connected the DI and DO pin | ||
| - | 2. Before you press the | + | 2. Before you press the "Write" button, Check the box what you like to send high data first |
| - | 3. Press the | + | 3. Press the "Read" button to get data from DO |
4. Press the "Enable" button to test WDT function | 4. Press the "Enable" button to test WDT function | ||
Revision as of 17:23, 8 January 2009
Contents |
Introduction
Define Pin Address
   #define INTEL_WDTE	0x600
   #define INTEL_WDTD	0x604
   #define INTEL_DI	0x608
   #define INTEL_DO	0x60C
Initialize WinIO & Uninitializ WinIO
   InitializeWinIo()
   ShutdownWinIo()
Set DI/DO
   DO: DIO_Write(BYTE dwDataVal)
       {
           SetPortVal(INTEL_DO, dwDataVal, 1);
       }
   DI: DIO_Read()
       {
           DWORD dwPortVal;
           GetPortVal(INTEL_DI, &dwPortVal,1 );
           return (BYTE)(dwPortVal);
       }
Enable/Disable WDT
   Enable : SetPortVal(INTEL_WDTE, m_CountDown, 1);    // m_CountDown is timer of WDT
   Disable: GetPortVal(INTEL_WDTD,&dwPortVal,1);
The Sample code source you can download from
For Looping test
( This sample code using WinIO.dll )
For Single pin test
How to use this Demo Application
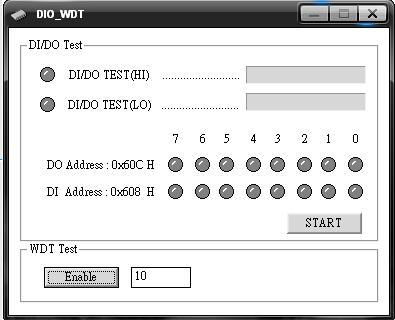
For Looping test
1. Press the "Start" button to test DIO function
2. Press the "Enable" button to test WDT function
3. Press the "Disable" button when WDT enable to disable WDT
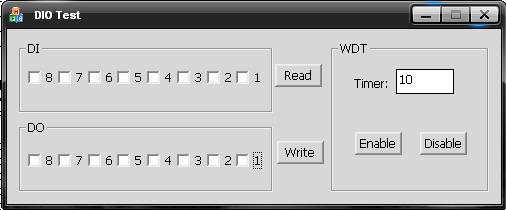
For Single pin test
1. Connected the DI and DO pin
2. Before you press the "Write" button, Check the box what you like to send high data first
3. Press the "Read" button to get data from DO
4. Press the "Enable" button to test WDT function
5. Press the "Disable" button when WDT enable to disable WDT


